
Turn on suggestions
Auto-suggest helps you quickly narrow down your search results by suggesting possible matches as you type.
Showing results for
Turn on suggestions
Auto-suggest helps you quickly narrow down your search results by suggesting possible matches as you type.
Showing results for
Community Tip - You can subscribe to a forum, label or individual post and receive email notifications when someone posts a new topic or reply. Learn more! X
Options
- Subscribe to RSS Feed
- Mark as New
- Mark as Read
- Bookmark
- Subscribe
- Printer Friendly Page
- Notify Moderator
Exploring ThingWorx Android SDK together with web based Revision Control System and secured connection to ThingWorx Server
No ratings
In this blog I will be covering the initial setup of ThingWorx Android SDK with a sample app (supplied with the Android SDK) and set it up with a web based revision control system like Bitbucket's (free account plan). I'll also be covering quick information on how to enable the HTTPS connection for the ThingWorx server on Windows platform. This will allow for secured connection to the ThingWorx server from the Android application.
Do note this is only a reference guide for setting it up with revision control system, you’re free to choose to setup the Android Studio without Bitbucket or with any other revision control system. It’ll be just fine to have a local Git/SVN/Perforce etc. to manage the code repository, setting Android Studio with Bitbucket is officially not supported.
Pre-requisite:
1. Download and unzip the ThingWorx Android SDK from https://support.ptc.com
2. An account with Bitbucket is required
3. Download and install Android Studio
Project Setup
1. Unzip the downloaded Android SDK on a local drive
2. Start the Android Studio > Import project > navigate to the sample applications location provided with the ThingWorx Android SDK e.g. Thingworx-Android-SDK-X.x.x\samples
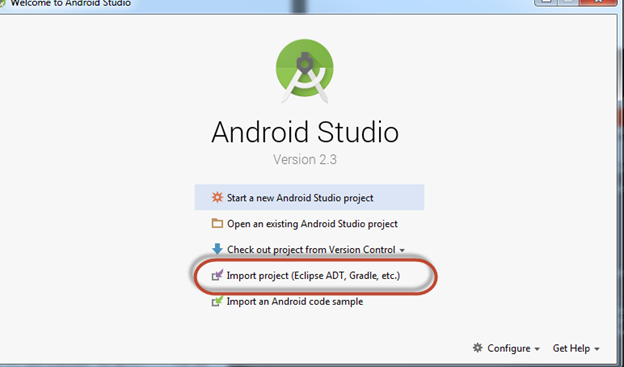
3. Select one of the sample application e.g. androidShell, with ThingWorx Android SDK X.x.x there are 3 sample applications currently available when the Android SDK is downloaded:
a. Android File Brwoser
b. Android Shell
c. Android Steam Thing
4. For this blog I'll be setting up the androidShell Android Application
5. Do note that all the sample projects are built using Gradle, so while importing if required select Gradle as the build system for the sample application
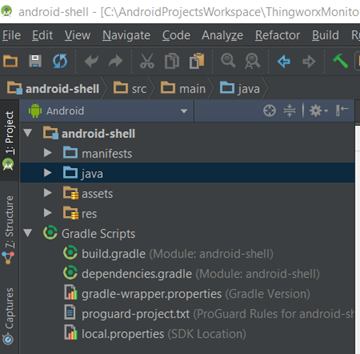
6. Once imported successfully in Android Studio you should be able to see the Android project and its file structure like so
7. We'll need an account with Bitbucket, create one if you don't have already
8. Logon to Bitbucket and create a team and new repository under that team
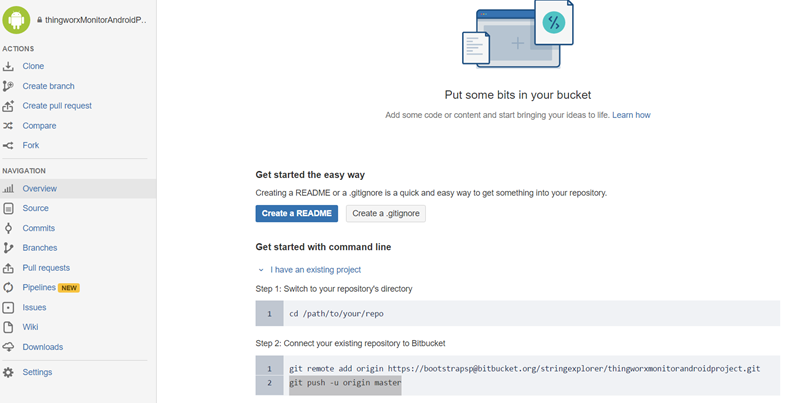
9. Navigate to the repository created in Bitbucket
10. Create a local GIT code repo if you don't already have one, and copy over all the contents from the Android SDK x.x.x.zip to that location
11. On your local machine open a command prompt and navigate to the drive where the local GIT's code repository resides, i.e. the folder where you unzipped the android SDK and execute the commands as mentioned:
a. git remote add origin https://<accountName@bitbucket.org>/<teamName>/<projectName>.git
b. git push -u origin master
Note: This will add the contents of your local GIT repository to the empty code repository you’ve created under the team on Bitbucket.
12. You can also use SourceTree UI application on windows for creating, GIT and Mercury based code repository and connect it to your Bitbucket account
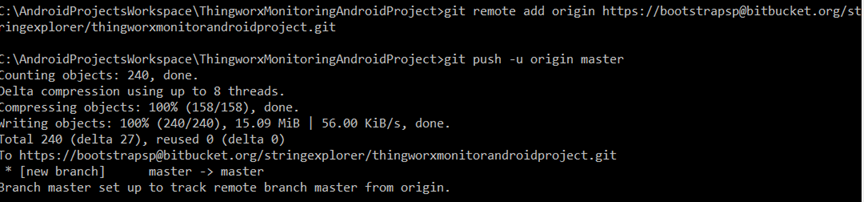
13. On successful commit following will be logged in the command prompt
Enabling HTTPS on Tomcat and connecting to Android Application
Securing Tomcat on Windows
You can skip this section if you already have Tomcat running ThingWorx configured for HTTPS connection.
1. Execute the command in a command prompt
C:\>"%JAVA_HOME%\bin\keytool" -genkey -alias tomcat -keyalg RSA -keystore C:\KeystoreTomcat\tomcat.keystore
Note: Executing above step will require you to add additional information to the keystore like, Org name, full name location, etc.
2. Edit the <tomcatInstallation>\conf\server.xml file
<Connector
port="8443" protocol="org.apache.coyote.http11.Http11NioProtocol"
maxThreads="200" SSLEnabled="true" scheme="https" secure="true" keystoreFile="C:\KeystoreTomcat\tomcat.keystore" keystorePass="<giveYourPasswordHere>" clientAuth="false" sslProtocol="TLS">
<!-- <SSLHostConfig>
<Certificate certificateKeystoreFile="conf/localhost-rsa.jks"
type="RSA" />
</SSLHostConfig>-->
</Connector>
3. Restart the tomcat service
Note: For detailed information on securing the Tomcat on Windows refer to SSL/TLS Configuration How-TO . Note HTTPS setup is only for the Tomcat where ThingWorx is deployed and does not involve certificate setup on the Android Application side
Finally,to test if the HTTPS setup was successful or not navigate to https://<serverName/IP>:8443/Thingworx in a web browser. Port 8443 is the default HTTPS port.
Starting and connecting Android Application to ThingWorx
Now that we have a working secured Tomcat and Android Studio setup with the sample Android Application, androidShell. Let's build and run the application using an emulated Android device in Android Studio
1. Navigate to https://localhost:8443/Thingworx > Import/Export > Import from file and import the Thing entity which will connect to the SampleThing when you’ll run the Android application, for e.g. I imported the Thingworx-Android-SDK-X.X.X\samples\android-shell\entity\Things_AndroidSampleThing.xml because I will be running the androidShell application
2. Attempting to run the Android application without the entity created in ThingWorx first, Thing will show as unbound in RemoteThing.
3. Create an AppKey in ThingWorx > Security > Application Keys with sufficient rights
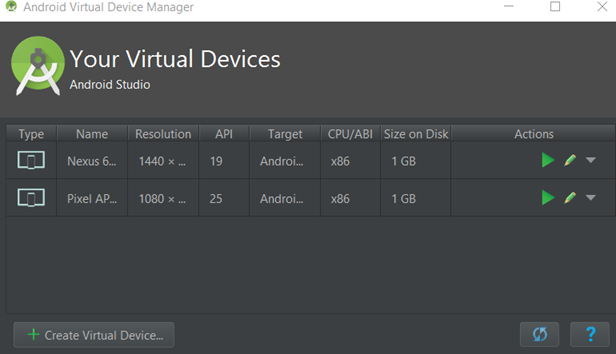
4. Go to the Android Studio's toolbar and click on AVD Manager icon 
5. This will open the Android Virtual Device Manager and lets you create a virtual Android device
6. You can of course use your own actual device to connect over USB and install and test the application on actual hardware
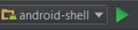
7. If you already have a Virtual or actual device connected to the system, click on Make Project icon in the toolbar 
8. Once the Make finishes run the sample application, in my case androidShell application with the Run icon, like so
9. You may now be prompted with the options to select a device virtual or actual
10. Select as desired and click OK
11. This will now launch the application on the selected device, I have selected to launch on the virtual device which will start and emulated Android Device
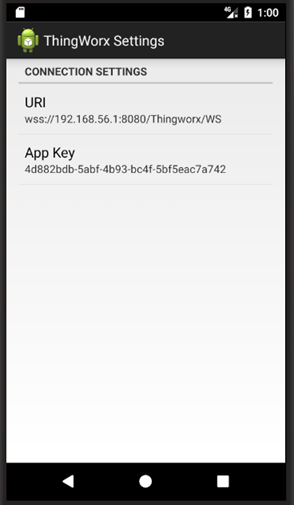
12. When initiating/running the application for the first time you will be directed to the Settings screen allowing you to enter the connection URI and the Application Key to connect to the ThingWorx server
13. You have to follow one of the following two URI schemes while attempting to connect to a ThingWorx Server
a. For HTTP connection use : ws://<machineIP/Name>:8080/Thingworx/WS
b. For HTTPS connection use : wss://<machineIP/Name>:8443/Thingworx/WS
Note: Ports may differ as these are the default ports, if you are running ThingWorx on different port enhance the URI accordingly
14. Since my ThingWorx is reachable on HTTPS connection i'll use the HTTPS connectino URI scheme and the application key that I have already created in the ThingWorx, which is bound to Administrator user
15. Once done press the back button on the screen to initiate the connection attempt
16. If all's set as it should be you will be able to see the Connected to Server option checked and the Property count for the Serial Number Property being updated every second

For more detail on ThingWorx Android SDK refer to the ThingWorx Edge SDKs and WebScocket based Edge MicroServer (WS EMS) Help Center
